Labels

Wednesday, March 18, 2020

Stone path for a dollhouse/miniature


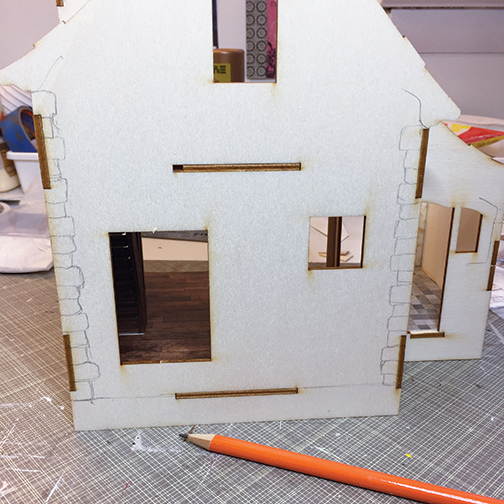
This is how I made a stone path to lead up to the Nutcote cottage kit from Red Cottage Miniatures. The kit came with some laser cut wood steps so I used them as a template and traced them on some rolled out Paperclay. However, I made the stone path free hand. Keep in mind that his technique will work in any scale. I placed my cottage on the base for the layout but will not be gluing it down incase I sell this piece when it is finished. This way it will be easier to ship and all my hard work will stay safe.


 Outline where your path will be on your surface. Use a pencil! I used a pen and it kept bleeding into my clay. I temporarily put my steps in place and started about 1/8” away from them.

  Start by cutting a palm full of Paperclay from your package and then seal up your bag. Knead the Paperclay with your fingers on wax paper and then roll it out to about 1/8-1/16” thick. I am using a plastic clay roller. You could also just use a bottle.

 I cut out my step tops and set them aside to dry. Then I laid a piece of thin clay over my path outline and started cutting stone shapes like a jigsaw puzzle, but I left room in-between for the grass to grow in between the stones. I have built stone paths in real life and know that they are never a perfect fit unless it’s an artificial path so don’t worry if there are uneven gaps because this will only add to the charm. I would take an organic natural stone path over a machine made one any day!


 When you get about 4 stones cut to shape, smooth their sides and spread wood glue down and place them down pressing very gently.  Add any texture you may want to make it look like a specific stone. I used a crumbled up piece of fabric I had on hand. Paper may be too sharp but you could use foil. If you use foil, you need to really crumble it up and press it as flat as you can on a hard surface so the texture is very faint and doesn’t cut into the clay.


 While it is drying, go back and check on it because Paperclay shrinks and you may need to pat it down if it curls while it is drying, but only if you missed gluing an area. For the step tops, I kept flipping them over while they dried because they are not glued down yet and were curling up. Once dry, I glued my steps together using the Paperclay pieces for the tops and the step base wood pieces that came with the kit. Then glued the steps in their place with a weight on them.

Painting stone
 Mix some Ceramcoat Brown Iron Oxide with a good amount of water to make a wash. Brush onto the stone being sure to cover the sides as well as the top of the stones.


 Go back over with a wash of Ceramcoat Khaki but just on certain parts of each stone to add another layer of color.


 I dabbed the stone with a cotton cloth to get a nice blend. Let dry.

Applying grass
 Grind up some reindeer moss in a coffee bean grinder to get it nice and fine.


 Add some glue around the stones with a toothpick. If you have Elmer’s white glue the cap will be narrow enough to apply without a toothpick.


 Apply the fine reindeer moss material into the glue. Press with your fingers to get it deep in the gaps.

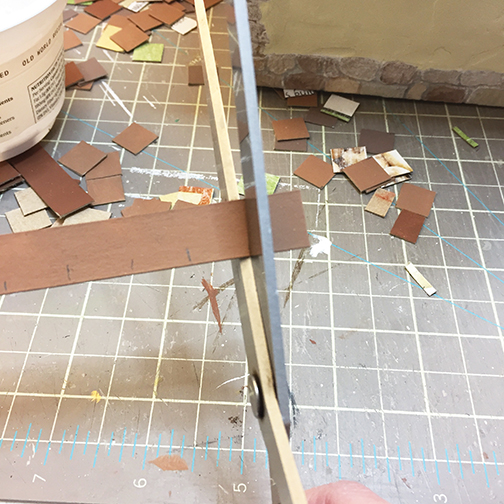
 Go in with small scissors if there are any stragglers that look too bulky.

Looking back,  I should have painted the board in a matching green first!

Wednesday, March 11, 2020

Dollhouse roofing


Simple roofing techniques for a half scale cottage


Let's roof the Nutcote cottage kit by Red Cottage Miniatures. I decided I would have regular shingles for my roof to accentuate the curved slope. Initially I wanted shingles with three different tones, but after starting I could see it would be too busy for this house. So I applied one coat of brown over them and loved the effect the different tones created through the brown paint. I first gave the underside of the roof a white wash so it would look nice on the inside of the house.
I will be showing you how to make three tones and you can decide what you want your finished roof to look like.

I tend to save cereal box cardboard so this is what was used for this project. Cut the cardboard to one piece without the folds 
attached. You will need about three 9” x 9” pieces, but having extra never hurts.

Rub fine sandpaper over the shiny side of the cereal box cardboard to give it some texture to hold the glue later.

Paint each piece one of the colors. I found a dark, medium, and light, family of brown acrylics that worked well together. Squirt the paint on and smooth it over the cardboard then go back in while each section is wet and add texture with your brush by dabbing it. Let them dry.


Make a pencil mark 
every 1/2” at the top and bottom of each board. Cut the strips with a metal ruler and craft knife.

Then lay the strips on your cutting board and make a mark every 1/2”. 
I marked two at a time next to each other. Then put an unmarked piece behind a marked one and cut the squares with scissors.


Start your first row with about 1/16” hanging over the roof. Use the preexisting horizontal lines on the roof as your guide to help keep things straight.


Note that I wasn’t concerned about precision for my roof. I wanted it a little topsy-turvy to give it charm. So some shingles are lower than others.

Apply wood glue along the roof and let it get tacky while you line up a row of your shingle color selections on your cutting board that equal the length of the roof. Then start applying them to the roof.

I kept the front of the house flush and let any overhang happen at the back of the house. Which I trimmed off once finished with small sharp scissors.

For the second row, cut a shingle in half and apply the half piece as your first piece and continue on until you have covered your roof. Let dry.

Line the peak of the roof.


Then take the darkest of the browns and apply a thin coat to the shingles in a circular motion with your brush. This way you get all the edges and the tones of the underlying shingles will show through. Apply paint to all the edges as well.


Once dry, you can add some moss or discoloration if you like. If you decide to have a chimney, build that before you assemble your shingles. You could even add some copper flashing around the chimney base!


Monday, March 9, 2020

dollhouse stucco facade


After some research I decided I wanted the facade of this 1/2" scale cottage from
 Red Cottage Miniatures to have a stucco look. There are lots of different textures you can create so be sure to reference your research photos while creating your stucco.
First, the windows were stained and then glued on as directed. Go ahead and put some matt or semi gloss varnish on them to protect them from the stucco.
I didn’t do this because 
I had a feeling I would stain them a little darker once 
I saw the facade color. So I was extra careful applying the spackle.


Use a spackle knife to apply the spackle. I used a small spackle knife and my painter’s palette knife for the smaller areas. It has some flexibility when applying with pressure and that helps. Yes, it is pink, but have no fear it will be white when dry. Try not to cover the rocks too much. Apply along the rocks pulling the knife away from to the side.


Once it turns white there, gently go around and scrape it off with the tip of the palette knife or and exit knife. Get it out of the grout areas as well. The Paperclay may scrape off as well so you must be gentle.

 I wiped one section of the rock with a damp cloth and it took off the paint. So you could matt varnish the rocks first to protect them if you like.

Just when it turns white, before it is too hard, you can rub your finger over the extra rough areas to smooth out if you like. It helps with excessive sanding later. You can apply a second coat if you don’t like some of the areas. Treat this part like a sculpture. Keep scraping, and sanding with very fine sandpaper and reapplying until you are happy.

Once you are happy, brush off all the dust with a big soft brush. Do all the sanding and this part outside if you can.

I used a mix of Ceramcoat acrylic paints to get the pale yellow I wanted. Use a small brush to paint around the edges against the rocks and windows one section at a time. Then use a medium small brush for the rest. Apply as if you were in scale with the house with small strokes. This will give a nice texture.

 I added a bit of age to the stucco by using a coarse paintbrush to apply brown and grey charcoals. You can use this same technique for interior walls.

Next I will be installing the roof and shingling.

Tuesday, March 3, 2020

dollhouse stone work

I will be showing you how to put some stonework on the exterior of tis Nutcote cottage kit by Red Cottage Miniatures.
I’ve chosen to use Paperclay for my stonework. I will be putting stone on the corners and base of the house and the rest will be stucco. The stucco tutorial will be next month. Keep in mind you can carve the stonework into the stucco instead. It just comes down to the effect that you want in the end and what materials you enjoy working with.


 First, I placed the door trim and roof trim on the house and marked where my stones need to stop with a pencil.


 Next draw a rough idea of how your stones will look on the corners.

Tape down some wax paper with blue tape and open your bag of Paperclay removing a small handful. Seal up your bag immediately with some cling wrap.

Paperclay is different than polymer clay. Rolling it in your hands into a long tube may dry it out. I recommend shaping it with the tips of your fingers against your work table on the wax paper until you get a long shape and then roll it out.


 Roll it out to about 1/8” thin. Don’t try to make your rolling smooth and perfect because any texture from wrinkles and cracks will add to the effect. When you scrape it up with your clay knife you will get even more which is great.

Cut it to about 1 1/4” wide. Roll away the excess on either side and then slide a clay knife under the strip to lift it from the wax paper. If it gives you trouble just wet your blade. Don’t worry if there are creases and cracks because they will only add to the effect of the stone.


 Lay that piece upside down so it doesn’t stick to the paper again and coat some wood glue on the area you will be applying. Rub it in with your finger.


 Lay the strip of clay over it and press and wrap around the corner. Pat down to adhere to the glue.


 Use a knitting needle to make grout lines. Try not to make each rock the same. Some will be thinner some will be thicker.


 Take your knife and start cutting your stones to different lengths. Pull away the excess with your craft knife.


 Press your finger up against all the edges to round them a little bit. Then you can use your knife to cut away anything that looks too square and tap it with your finger again.

Next get a coarse paintbrush and gently stipple the clay so it has some texture.


Go back in and re-check your grout lines with your knitting needle to be sure they are visible.

Continue on and do this where ever you would like there to be corner stone. It is best if you have a realistic photograph of stone in front of you to help you achieve realism for the corner and the base stones on the house.

I will also be adding stone around the base of my cottage. For this, roll out the paper clay to the length and width desired, apply wood glue on the area, and lay the strip down.

Use your knitting needle to mark out where your grout lines will be. Make indents along the top between the rocks

Once you are happy, texturize as desired. Sometimes I use the back of my finger nail in different areas to quickly make indents for texture. And then follow it up with the coarse paint brush stippling.

Let everything dry. You worked hard so take a break or come back to it tomorrow. Don’t freak out if there are cracks from shrinkage when dry. Paperclay does get smaller when it dries but if you’re making stone this is a nice surprise. Hey that rhymes!

Painting stone

Make a light wash with a drop of dark brown and black. Paint your stones while patting excess away with a paper towel, unless you want your grout to be lighter in color then you can leave it as is.


  Make a wash of orange, brown, and tan or whatever color you choose. I used yogurt cups to hold my colors.

  Start with whatever color you want first and paint random stones. Avoid getting paint in the grout areas.

  Don’t make any judgments until the paint has dried because it does change color. Once you have designated all your stones with a color, go back in with a fine brush and your washers and add definition, make sure you have clean edges against the grout. But don’t let your paint get muddy. It is best to apply lighter and then slowly build up the color vibrancy as it dries.


There are a lot of stone color variations you could make for your project so do your research about the possibilities and think about what stone colors will work with the color you want your house to be and the setting it will be in.
Also keep this technique in mind for a stone fireplace inside if you like.
Most of this I learned from Rik Pierce, but I added my own variations. I would highly recommend purchasing his tutorial book to learn his exact way of making stone and brick. He has many other great tutorials in this book as well.
That’s it! Next month we will be adding the stucco to the rest of the house. So start thinking about what color you would like your cottage to be.
If you want to follow along with me through this year, you could purchase your own cottage kit at www. 
redcottageminiatures.com.

Go to Etsy and type in FrogmortonStudios. This is the shop of Rik Pierce. The Master pf Paperclay. Get his tutorial book. You won’t regret it and you will thank me! There are so many great tips in there! Plus he is such a sweet soul!