
Simple roofing techniques for a half scale cottage
Let's roof the Nutcote cottage kit by Red Cottage Miniatures. I decided I would have regular shingles for my roof to accentuate the curved slope. Initially I wanted shingles with three different tones, but after starting I could see it would be too busy for this house. So I applied one coat of brown over them and loved the effect the different tones created through the brown paint. I first gave the underside of the roof a white wash so it would look nice on the inside of the house.
I will be showing you how to make three tones and you can decide what you want your finished roof to look like.
I tend to save cereal box cardboard so this is what was used for this project. Cut the cardboard to one piece without the folds attached. You will need about three 9” x 9” pieces, but having extra never hurts.
Rub fine sandpaper over the shiny side of the cereal box cardboard to give it some texture to hold the glue later.

Paint each piece one of the colors. I found a dark, medium, and light, family of brown acrylics that worked well together. Squirt the paint on and smooth it over the cardboard then go back in while each section is wet and add texture with your brush by dabbing it. Let them dry.

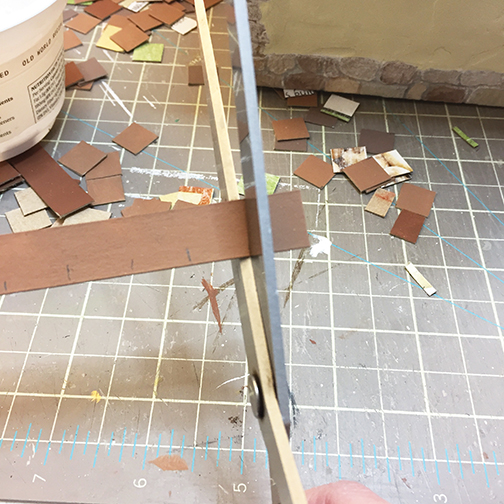
Then lay the strips on your cutting board and make a mark every 1/2”. I marked two at a time next to each other. Then put an unmarked piece behind a marked one and cut the squares with scissors.


Start your first row with about 1/16” hanging over the roof. Use the preexisting horizontal lines on the roof as your guide to help keep things straight.

Note that I wasn’t concerned about precision for my roof. I wanted it a little topsy-turvy to give it charm. So some shingles are lower than others.
Apply wood glue along the roof and let it get tacky while you line up a row of your shingle color selections on your cutting board that equal the length of the roof. Then start applying them to the roof.
I kept the front of the house flush and let any overhang happen at the back of the house. Which I trimmed off once finished with small sharp scissors.
For the second row, cut a shingle in half and apply the half piece as your first piece and continue on until you have covered your roof. Let dry.
Line the peak of the roof.


Then take the darkest of the browns and apply a thin coat to the shingles in a circular motion with your brush. This way you get all the edges and the tones of the underlying shingles will show through. Apply paint to all the edges as well.


Once dry, you can add some moss or discoloration if you like. If you decide to have a chimney, build that before you assemble your shingles. You could even add some copper flashing around the chimney base!


great tutorial, thank you very much
ReplyDelete