I’ve chosen to use Paperclay for my stonework. I will be putting stone on the corners and base of the house and the rest will be stucco. The stucco tutorial will be next month. Keep in mind you can carve the stonework into the stucco instead. It just comes down to the effect that you want in the end and what materials you enjoy working with.

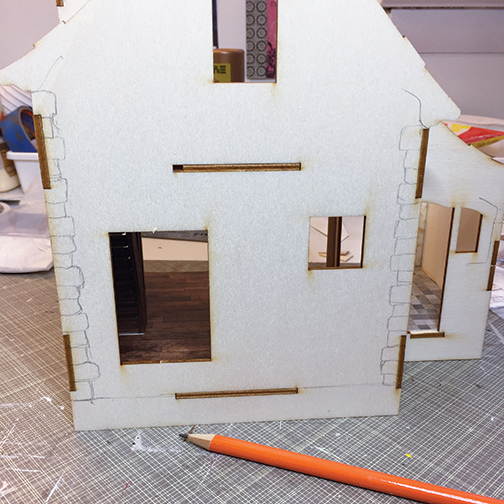
First, I placed the door trim and roof trim on the house and marked where my stones need to stop with a pencil.


Next draw a rough idea of how your stones will look on the corners.
Tape down some wax paper with blue tape and open your bag of Paperclay removing a small handful. Seal up your bag immediately with some cling wrap.
Paperclay is different than polymer clay. Rolling it in your hands into a long tube may dry it out. I recommend shaping it with the tips of your fingers against your work table on the wax paper until you get a long shape and then roll it out.
Roll it out to about 1/8” thin. Don’t try to make your rolling smooth and perfect because any texture from wrinkles and cracks will add to the effect. When you scrape it up with your clay knife you will get even more which is great.

Cut it to about 1 1/4” wide. Roll away the excess on either side and then slide a clay knife under the strip to lift it from the wax paper. If it gives you trouble just wet your blade. Don’t worry if there are creases and cracks because they will only add to the effect of the stone.


Lay that piece upside down so it doesn’t stick to the paper again and coat some wood glue on the area you will be applying. Rub it in with your finger.


Lay the strip of clay over it and press and wrap around the corner. Pat down to adhere to the glue.

Use a knitting needle to make grout lines. Try not to make each rock the same. Some will be thinner some will be thicker.

Take your knife and start cutting your stones to different lengths. Pull away the excess with your craft knife.

Press your finger up against all the edges to round them a little bit. Then you can use your knife to cut away anything that looks too square and tap it with your finger again.
Next get a coarse paintbrush and gently stipple the clay so it has some texture.

Go back in and re-check your grout lines with your knitting needle to be sure they are visible.
Continue on and do this where ever you would like there to be corner stone. It is best if you have a realistic photograph of stone in front of you to help you achieve realism for the corner and the base stones on the house.
I will also be adding stone around the base of my cottage. For this, roll out the paper clay to the length and width desired, apply wood glue on the area, and lay the strip down.
Use your knitting needle to mark out where your grout lines will be. Make indents along the top between the rocks
Once you are happy, texturize as desired. Sometimes I use the back of my finger nail in different areas to quickly make indents for texture. And then follow it up with the coarse paint brush stippling.
Let everything dry. You worked hard so take a break or come back to it tomorrow. Don’t freak out if there are cracks from shrinkage when dry. Paperclay does get smaller when it dries but if you’re making stone this is a nice surprise. Hey that rhymes!
Painting stone
Make a light wash with a drop of dark brown and black. Paint your stones while patting excess away with a paper towel, unless you want your grout to be lighter in color then you can leave it as is.

Make a wash of orange, brown, and tan or whatever color you choose. I used yogurt cups to hold my colors.
Start with whatever color you want first and paint random stones. Avoid getting paint in the grout areas.

Don’t make any judgments until the paint has dried because it does change color. Once you have designated all your stones with a color, go back in with a fine brush and your washers and add definition, make sure you have clean edges against the grout. But don’t let your paint get muddy. It is best to apply lighter and then slowly build up the color vibrancy as it dries.


There are a lot of stone color variations you could make for your project so do your research about the possibilities and think about what stone colors will work with the color you want your house to be and the setting it will be in.
Also keep this technique in mind for a stone fireplace inside if you like.
Most of this I learned from Rik Pierce, but I added my own variations. I would highly recommend purchasing his tutorial book to learn his exact way of making stone and brick. He has many other great tutorials in this book as well.
That’s it! Next month we will be adding the stucco to the rest of the house. So start thinking about what color you would like your cottage to be.
If you want to follow along with me through this year, you could purchase your own cottage kit at www. redcottageminiatures.com.
Go to Etsy and type in FrogmortonStudios. This is the shop of Rik Pierce. The Master pf Paperclay. Get his tutorial book. You won’t regret it and you will thank me! There are so many great tips in there! Plus he is such a sweet soul!


Un bonito resultado con la piedra-
ReplyDeleteI've never worked with Paperclay but you make it look easy. I'll have to try it next time I want stonework.
ReplyDeleteWhat a beautiful little house, nice to see how you make the stones.
ReplyDeleteGreat work! Thanks for the tutorial.
ReplyDelete