I have been working on my first “fantasy” style house. I imagine it would be a house for small elves up high in a tree deep in the woods. After having made so many “real life” houses it has been smooch fun to let loose and just create organically.
This is my progress so far.
This build is just a hair smaller than 1:12-scale. Much like a “petite” one-inch scale house.
The structure is foam board. Wall spackle for the stucco and wood for the trim. I added pieces of bark from the mighty oaks on my property. The pine cones for the roof were gathered from the trail I walk/jog weekly.
I will share some of my method here.
I drew out the house on graph paper. Highly recommend this if you are doing a scratch build. Each square is considered and inch. Helps a lot. I just started at the base and added each room one at a time. I wanted it to feel as if it may have started as a two room house and then, as the family expanded, they began to build upward.
The first level is the storage room. This is where they store their harvest. The first room where you would enter is the kitchen and granny elf lives in the next room.
A ladder (not shown yet) will take you to the sitting room. To the left is the bedroom of granny’s daughter and her husband. To the right will be the washroom.
Up the next ladder is the nursery for the triplets. Three tiny elves that are full of mischief!
On the bath roof will be rain barrels with pipes leading to the kitchen and washroom.
There is also a hummingbird roost where I will make hummingbird nests. This is how the elves get their eggs. Only sparingly of course.
The back of the house is a custom-cut piece of wood with a hook on it.
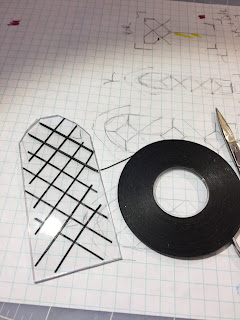
The stained glass windows were made using a tutorial by Rik Pierce. The only alteration I made was using graphic tape instead of lead tape.
He has great tutorials in his new tutorial book available at his Etsy store: frogmorton studios
I made everything in the kitchen from scratch, (stove, hutch, sink and dish washing tub). I will post the cooking stove photos separately. The trap door opens. I will make a hook on the hutch to hold it open. A ladder will also be added.
There will be electric but it will be for candles. I still have to paint all the candle lights to look like bee’s wax.
The front facade will have doors that open for each room. And hopefully I will be sculpting all the elves who live there and maybe even a few visitors.
Stay tuned for more progress photos as I go! Thank you for visiting!


I really wonder finished version of elf tree house.Fantastic
ReplyDeleteMe encantan estos ejercicios de fantasía. Un bonito proyecto.
ReplyDeleteI'm new to this and I love your ideas, I would love to see the finished product. I'm taking some online courses in sculpting so I'll be able to make a lot of my own things. Thank you for more ideas.
ReplyDeleteWhere did you get the clear plastic for the stained glass...
ReplyDeleteWhat did you use for the colors in your windows?
ReplyDeleteI used a method similar to one in Rik Pierce's tutorial book. Etsy FrogmortonStudios
Delete