
I sometimes contemplate putting up tutorials that are very simple but then I remind myself that it’s not always abut the complexity of a how-to. Many times it is more about what it will inspire someone else to make.
Sometimes I see a simple tutorial that inspires me to make a scene I never would have thought of. So here it is…
Primitive wood hammers
Start with a wooden dowel. This one is about 1/4” in circumference. Carve the end so it’s rounded. Get a drill bit that is as wide as a toothpick and drill a hole in the center.
Sand it so it is semi smooth. Perfectly smooth if you want something more modern.


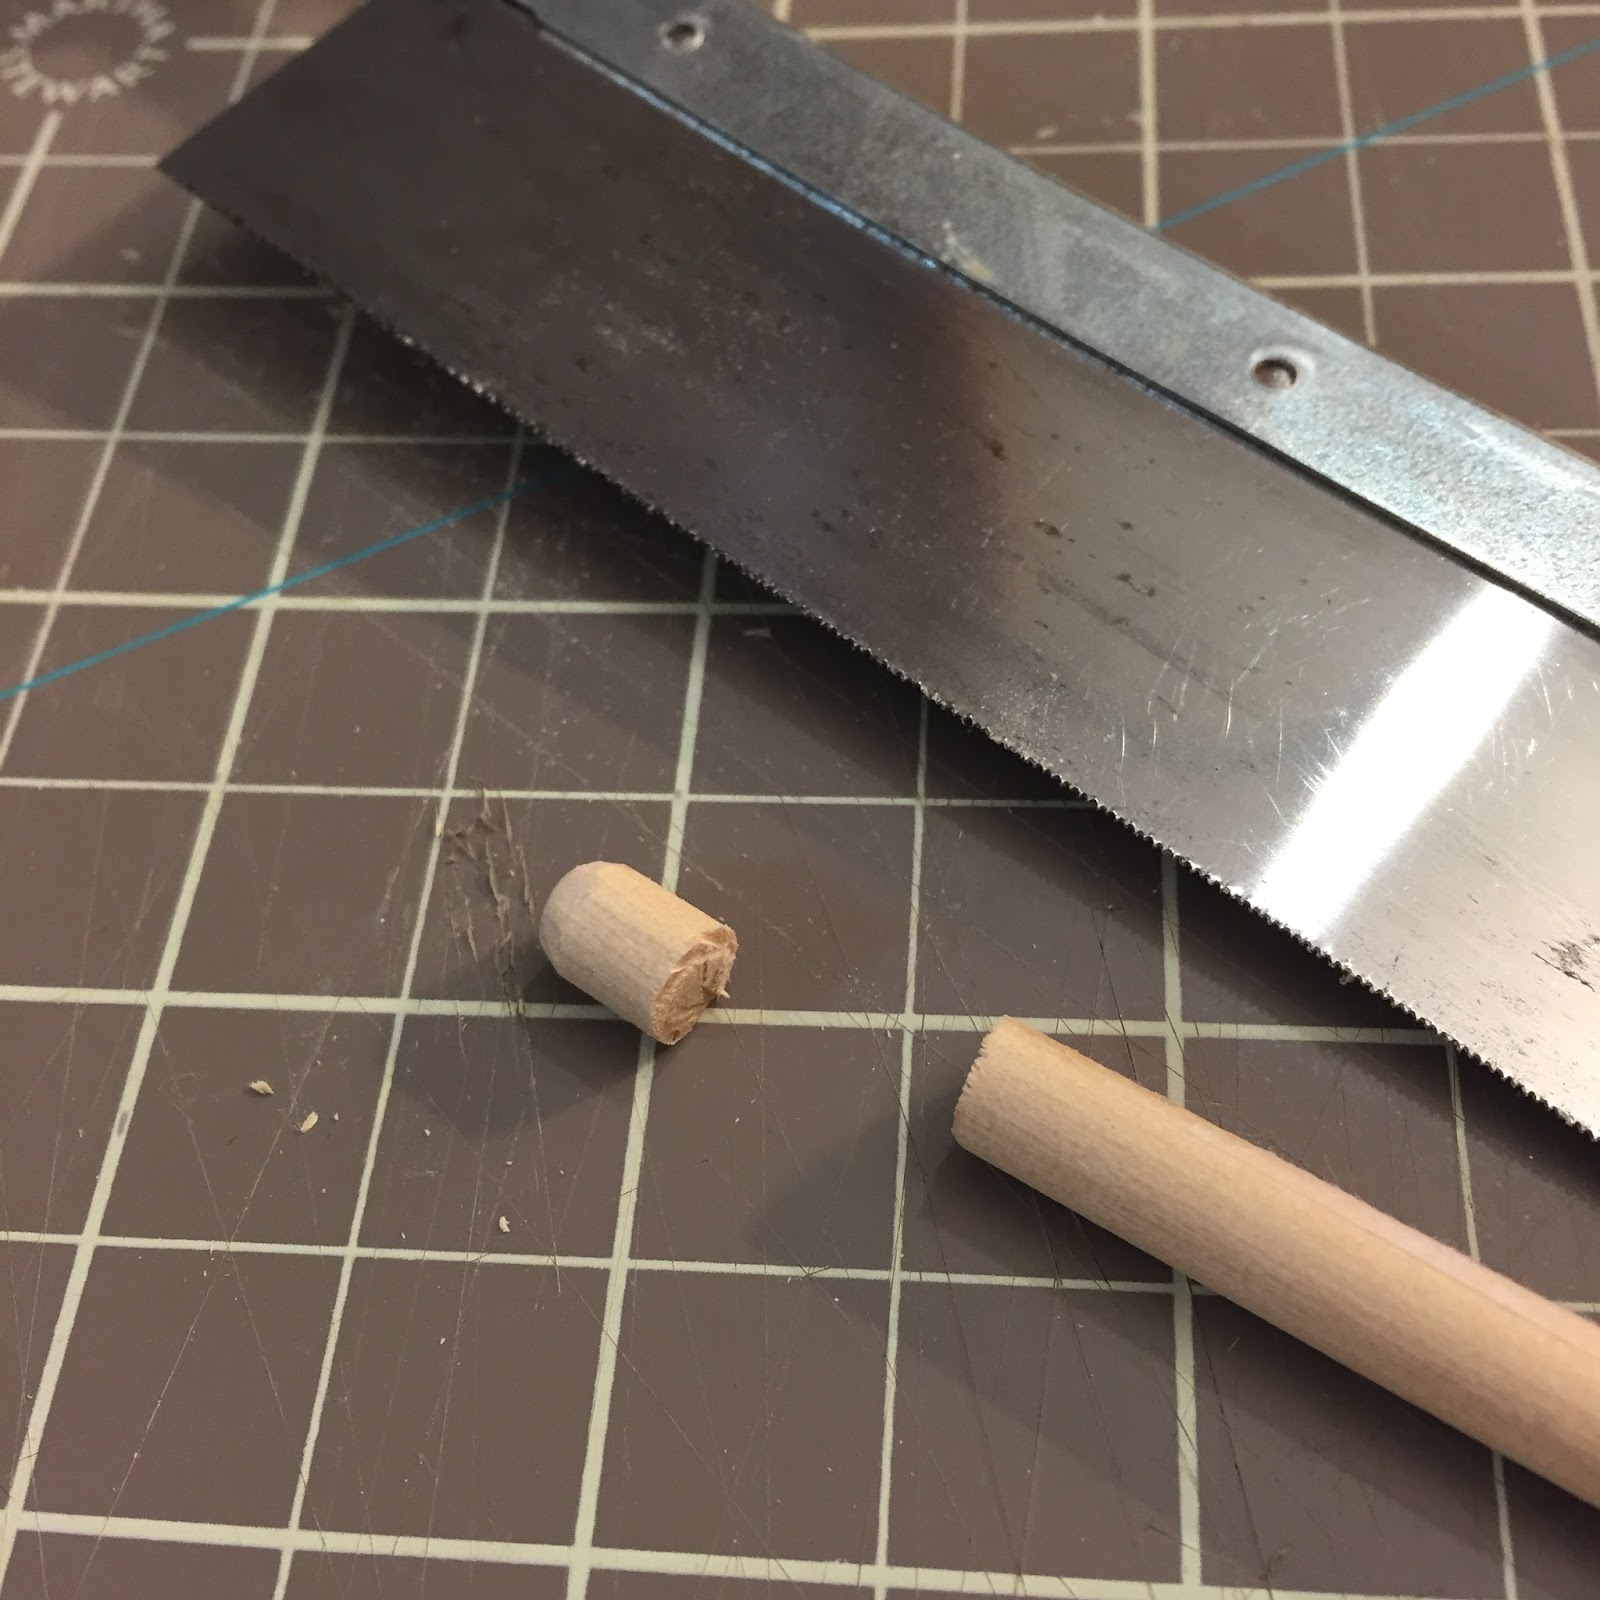
Cut the end off the dowel. Cut a toothpick and sand the end and glue it in the hole.
For the mallet/hammer use a similar method.
Stain everything your desired color.
Axe
Draw your handle shape on a piece of basswood. Carefully trim around it with an X-ACTO knife. Don’t press too hard or you will spit the wood. Take your time.


Once you get the shape carve the edges gently with the knife to make smoother, but still mainly flat. Sand the edges a little.
Use some polymer clay to shape the blade. Make the wood poke out of the top of the blade. I pressed it on the board in a basic shape. Then cut away what I did’t want. Slide a flat clay blade under it and flip it over. Shape with the knife again then carefully picked it up and shape the blade to have a sharper tip.


Once you are happy put it back down and cut excess clay away from the handle for the final shape. I kept one straight but added a point to the other on the neck of the wood.
Bake according to the manufactures instructions, let cool. You can sand the blade to get it sharper. Paint in a steel grey acrylic then go in and dry brush a lighter grey.
Stain the handle.
I mixed up some silver metallic dust with mat varnish and painted on the shiny blade edge.

Drill
Cut a toothpick and round the edges. Drill a tiny hole in the handle.
I had two tiny drill bits and decided to cut one to use as the tools drill but it went flying when I cut it and got lost in my studio. If you are going to attempt to cut one do it in a plastic baggie so it won’t fly away!
Instead, I covered wire with glue and wrapped thick thread around it in a spiral fashion. Then painted it silver.

Level
I cut into a piece of wood and made a clay handle. Then painted the clay to match the wood.
An acorn cup makes a perfect nail bowl!
The bee’s wax candles took a lot of trial and error to get the color I wanted. They are pretty close. My browns kept turning the clay green when baked.
I ended up using a smaller portion of translucent, yellow, and a tiny pinch of the right brown. If any one needs slim green colored candles let me know I have a large batch for free!


Now I'll have to try making some of these tools. Thanks for some great instructions.
ReplyDelete¡Una buena mesa de trabajo!
ReplyDeleteYour CLEVERNESS knows NO BOUNDS!!!
ReplyDeleteI'm in awe!