Labels

Showing posts with label DollHouse. Show all posts

Sunday, February 11, 2018

elf tree house


I have been working on my first “fantasy” style house. I imagine it would be a house for small elves up high in a tree deep in the woods. After having made so many “real life” houses it has been smooch fun to let loose and just create organically.

This is my progress so far.
This build is just a hair smaller than 1:12-scale. Much like a “petite” one-inch scale house.
The structure is foam board. Wall spackle for the stucco and wood for the trim. I added pieces of bark from the mighty oaks on my property. The pine cones for the roof were gathered from the trail I walk/jog weekly.


I will share some of my method here.

I drew out the house on graph paper. Highly recommend this if you are doing a scratch build. Each square is considered and inch. Helps a lot. I just started at the base and added each room one at a time. I wanted it to feel as if it may have started as a two room house and then, as the family expanded, they began to build upward.


The first level is the storage room. This is where they store their harvest. The first room where you would enter is the kitchen and granny elf lives in the next room. 


A ladder (not shown yet) will take you to the sitting room. To the left is the bedroom of granny’s daughter and her husband. To the right will be the washroom.


Up the next ladder is the nursery for the triplets. Three tiny elves that are full of mischief!

On the bath roof will be rain barrels with pipes leading to the kitchen and washroom. 
There is also a hummingbird roost where I will make hummingbird nests. This is how the elves get their eggs. Only sparingly of course. 


The back of the house is a custom-cut piece of wood with a hook on it. 

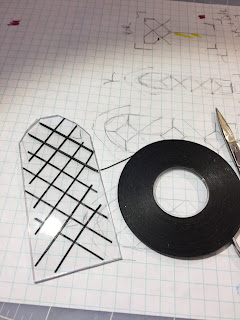
The stained glass windows were made using a tutorial by Rik Pierce. The only alteration I made was using graphic tape instead of lead tape.
He has great tutorials in his new tutorial book available at his Etsy store: frogmorton studios 


I made everything in the kitchen from scratch, (stove, hutch, sink and dish washing tub). I will post the cooking stove photos separately. The trap door opens. I will make a hook on the hutch to hold it open. A ladder will also be added.

There will be electric but it will be for candles. I still have to paint all the candle lights to look like bee’s wax.

The front facade will have doors that open for each room. And hopefully I will be sculpting all the elves who live there and maybe even a few visitors.


Stay tuned for more progress photos as I go! Thank you for visiting!

Monday, June 26, 2017

Dollhouse barn wood weathered effect

My first plan was to have my Cracker style 1930s house with white siding but then I decided to switch things up a bit and have it more weathered. I was online a few months ago looking at weathering wood videos for a different reason and thought this technique was so cool I decided to incorporate it into this project.

If you wan to learn more, then just research weathered wood with vinegar online. Lots of videos will pop up. Basically you soak steel wool in vinegar for 24 hours, steep a bunch of tea bags and then brush the tea onto your wood. After it is fairly dry you brush the vinegar on and wait.
I emphasize "wait". Some wood was quick to change and others took hours. I added another layer to the stubborn ones too soon and it was too dark in the end.


The house is on it's back. There will be a long porch roof attached to the seam of siding. Door and windows have not been trimmed out here just yet.


You can sand and score the "weathered" wood with the side of a knife blade  to add more wear too.
I used a jigsaw blade on its side and at an angle to have close-together scratches.
Below is a close up. I will be adding trim to cover each vertical seam.


Here are some more photos showing the start of my build.


Making the stair hole. The same way I made window holes.


Here is a photo so far. Note that this was taken with the house on it's side while the top side was drying with books on it. Just incase you get vertigo.


Aging the windows
I think I have figured out why this effect never worked for me before now. Paint choice!
I used The FolkArt after I used the Ceramcoat paint to have a lighter area and it barely did anything.
Ceramcoat worked beautifully. So if you have trouble with the crackle medium try a different brand of paint.


 I have noticed the thiner the coats of crackling medium the finer the cracks.


I will be posting more about this build as I go on this blog site.

Saturday, March 25, 2017

Building a faux primitive dollhouse


After seeing so many wonderful little primitive/folk dollhouses on eBay that I couldn’t afford I decided to make my own.
Then I came across two wonderfully handmade little creatures. Cookie the giraffe and Dee the dragon. A wonderful artist in Australia made them, Di Paulovich. You should take a look at her art its just amazing. Woollybuttbears on Etsy.

Cookie was perfect because she also has a vintage look. So she has been cheering me on along the way.


I was amped to finally start working in my newly organized wood-workshop in my basement. For the past three years I have been working hard at selling things I inherited out of my childhood home to make room. Thank you eBay!!

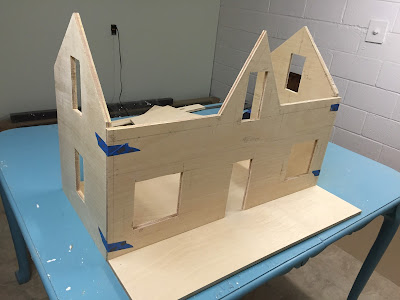
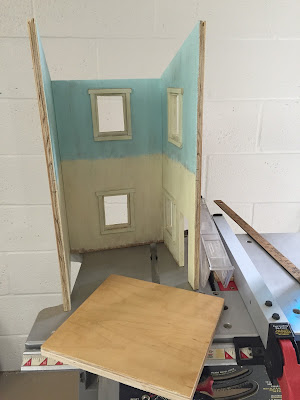
My goal for this build was to only use scrap wood I had in my basement. My father left me with some sheets of scrap wood from projects he worked on and always told me never to throw them out. I used my table saw, jigsaw, and drill to cut everything out. (The drill was used to drill holes in 2 of the corners of the window to fit the jigsaw into to cut out the squares.)


I also had some cans of paint left over from painting my human size house and mixed a few colors together.


After it was painted and dry I sanded it with coarse sandpaper, then used pastels rubbed on with my fingers and a damp coarse paint brush to dirty things up. The molding was left over stained wood from my Santa cottage that was damaged because of a white paint accident. I painted and sanded it so the dark stain came through.


I used finishing nails (which keep the wood from splitting) to piece everything together .


The beautiful floor was the only part I kept nice. I was just about to cave in and go to Home Depot to get nice wood for the floors when I found a thin sheet of this behind some boxes. So I stained, varnished, cut, and glued it onto a thicker piece of plywood.
I was so nervous because I only had a small bit of it and one wrong cut would ruin everything. Somehow I did mis-measure, but I trimmed out the mishap with molding on the bottom floor. It only added charm and mystery to the “old” house.


Above show my mis-measure before I trimmed it out.


I love looking at old primitive/folk dollhouses because they have a mysterious story. Imagining who made them so long ago and who they made them for is fun for me. And the fact that some have made it though the years of being handed down, getting thrown into moving vans or withstanding summer heat and winter chill in attics just add to the respect they deserve.

The fun in making this one was the freedom. Definitely more physically challenging because of the use of power tools and heavier wood, but lots of fun. I have always loved the sound of power tools and the smell of fresh cut wood since I was little. I would help my dad with small projects and my neighbor is a contractor so I grew up hearing his tools in his work shed.
Unfortunately my poor fingers get splinters and scraps throughout the process because gloves drive me nuts. But it’s nothing that a Hello Kitty band-aid can’t fix! This is also a great warm-up for building my next scratch build (1920s farm cottage). That will be much more precise.


Still have to finish the outside, but I was so excited I wanted to share my progress. 
I am still debating adding a skylight just incase Cookie the giraffe's neck decides to grow. ;)


Finished!

I may add some shutters and window boxes.