
Yellow card stock smooth
Water color paints
Medium and large soft watercolor brushes
Medium bristle brush
3-4small water containers
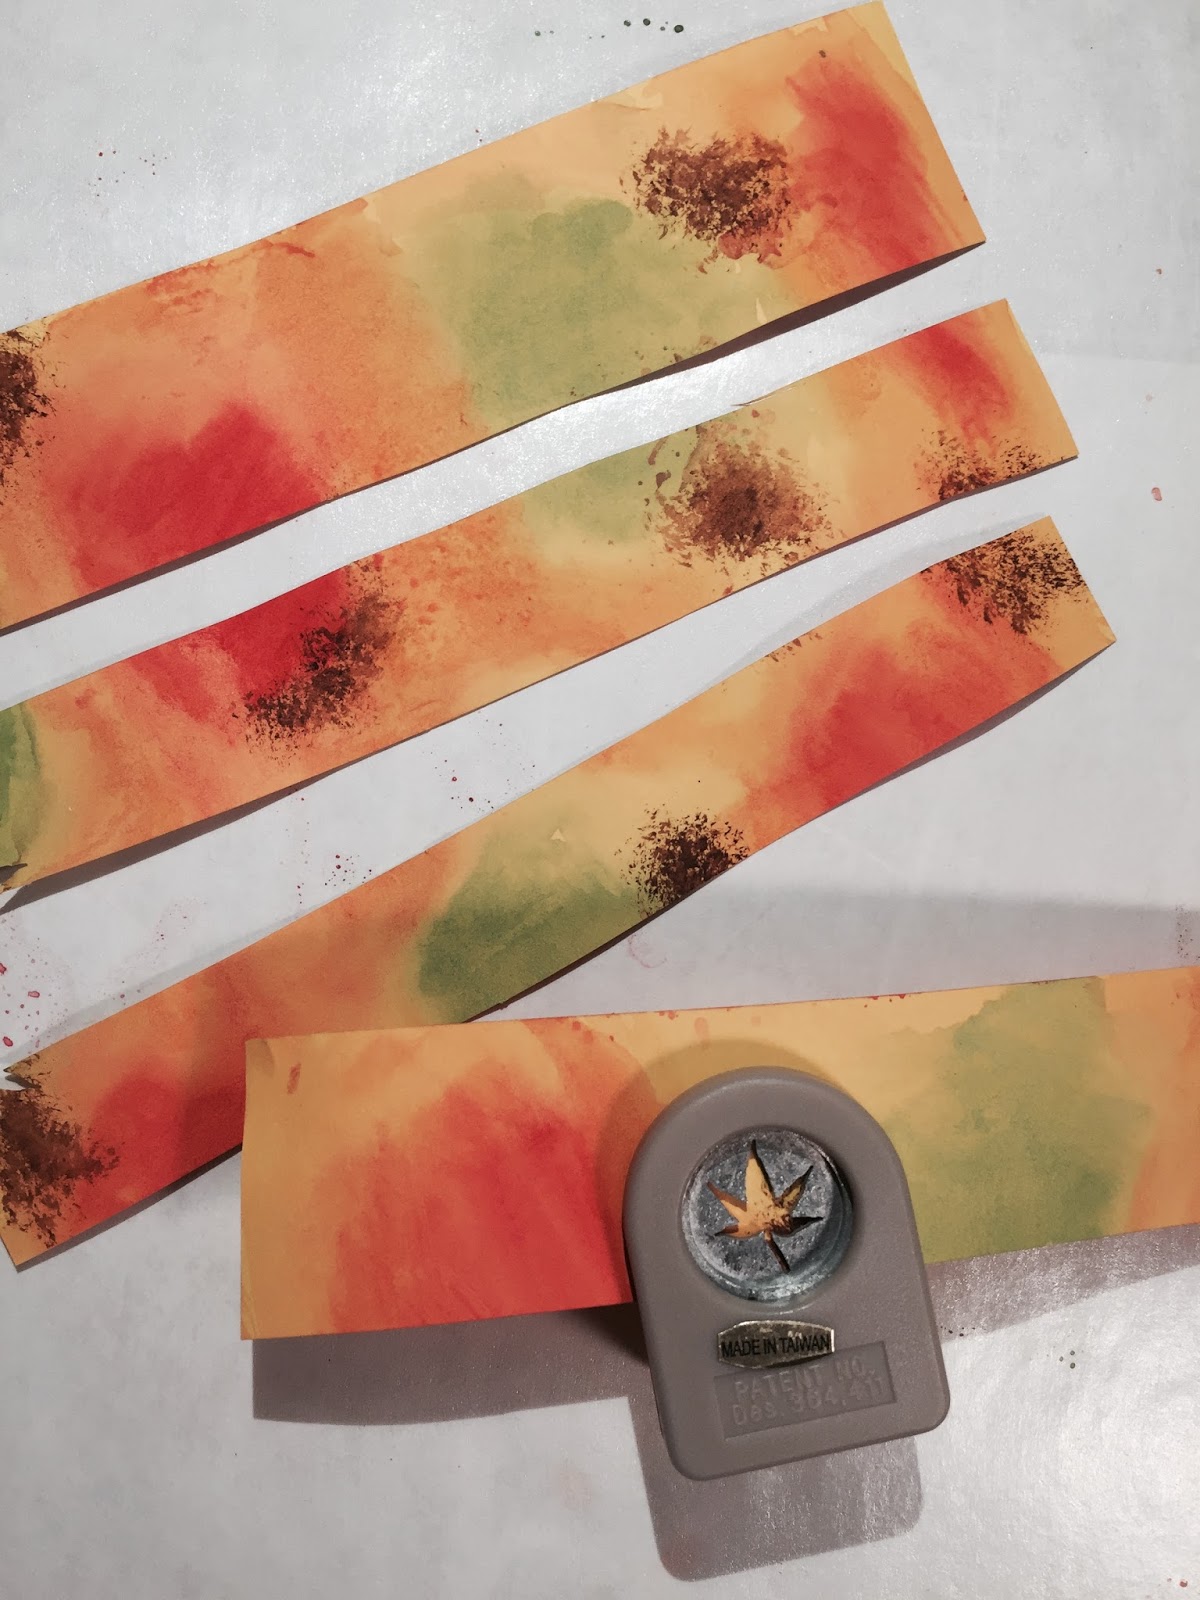
Punches both are maple half inch wide oak 5/8" long from stem to top
Old Washcloth or paper towel
I have always wanted to purchase some mini paper punches but was always concerned that ordering them online would invite a world of confusion trying to get the right scale.
Now that I am selling on Ebay regularly I have been searching for some things to purchase with the money I am making from selling things I needed to clear out.
I found these punches for a fair price and am very happy with the scale. I still need to fins an elm leaf punch though.
I thought of using real fall leaves for this but they will eventually dry up over time so this is a way to be a bit more efficient with my time. Never enough hours in the day for me so I try not to waste my creative time!
I have been romanticizing about a colorful mini pile of leaves with a rake in a garden for some time and now I can make that dream come true! Ugh, after i make a rake anyway ha!
I am using a regular piece of scrapbook paper that is yellow all the way through. I bought a small pack of colored papers so if you have a large sheet just cut it down so it will be more manageable.
Start by putting water on the corner of the yellow piece of paper with your watercolor brush.

Dip your brush in the water and put it in your orange watercolor paint and put that paint in the middle of the wet area.
Then put your brush in the red paint and put that paint in the center of the orange area.

If needed go back and put some clean water on your brush and work around the edges so that there's a nice fade.
If you wait a minute you can go back and put more red right on top and it will get brighter.
And then you can get your brush clean again and work a little water around the edges to soften it if needed. You want soft blends for the most part.
Use the same technique for a green area.

Note that if your brush has green and orange on it it will get muddy and turn brown. So you want to keep a few containers of water nearby to keep the brush clean. It is best if you keep one or two containers for the red/orange and one for the green. The red and orange water can mix, but you need to keep that green water separate so it doesn't get muddy and brown.

I keep an old washcloth nearby and dab my brush on it if I feel it has too much water. I prefer to have a washcloth in my studio to paper towels because I can just wash them and keep reusing them. Not only better for the environment but also saves some money!
Again in simple steps:
Wet the corner.

Add a good amount of red paint in the center.

Clean your brush and get more water on it.
Work the edges with cleanish water so it fades.
Get orange on your brush and blended in around the red.

Clean your brush and work the edges so they fade.
Do this all over the paper and then flip it over and match the same areas on the back the best you can. Doesn’t need to be perfect though.
If you start noticing that your paper is coming apart a little bit in places just ignore it because you'll be able to brush off those little pieces once it's dry.
Don't be afraid to put some bright red right up against the green.

Once you are happy with your painting, lean it against something so it can completely dry on both sides.

Once it is completely dry brush over it with a bigger brush to wipe off any small pieces of paper that came up.
Use a bristle brush and wet it, rub it in your brown paint and dab it straight up and down on a scarp piece of paper until it looks like stipples.


This effect will be with a leaf has gone brown.
Dab straight up and down with your brown painted brush in certain areas. Then let it dry for 30 seconds or so and then dab again to get it nice and dark.

Once you have finished let it completely dry so you can get clean edges from your punch.
Cut your paper into strips so you can punch from both sides and use all the paper.
Punch upside down so you can see what your leaf will look like and make a variety of them. Press down on the punch and the button will press on the table.

I also painted red and shades of brown onto a brown sheet of paper. After I cut them out I crinkled them by squeezing a handful in my palm so they look aged.
If you want to be a true mini maniac then go ahead and use a fine marker to make veins and stems. Otherwise throw them in a lovely pile, scatter a few on your dollhouse porch and roof, or use them in mini arrangements for decorating.
As always, each tutorial is a starting place. It is up to you to take it to the next level and make improvements and please be sure to share your inventive methods with others. By sharing our techniques we help propel each other to amazing new heights as artists!


Your leaves turned out great. Every time I try to make my own they turn out a disaster. Can I ask you where you got your punches? I have a fairy garden in a terrarium and need to make leaves using your tutorial. Any help is appreciated. Thanks
ReplyDeleteDiane
http://myminiaturesjournal.blogspot.com/
I found them on Ebay!
ReplyDeleteseller name: redluv2scrapbook
I got the "small" ones.
Small Japanese Maple Leaf Punch 5/8 inch 18 mm
see if this link will take you there.
http://www.ebay.com/sch/m.html?_odkw=&_ssn=redluv2scrapbook&_armrs=1&_osacat=0&_from=R40&_trksid=p2046732.m570.l1313.TR1.TRC0.A0.H0.Xsmall+paper+puch.TRS0&_nkw=small+paper+puch&_sacat=0