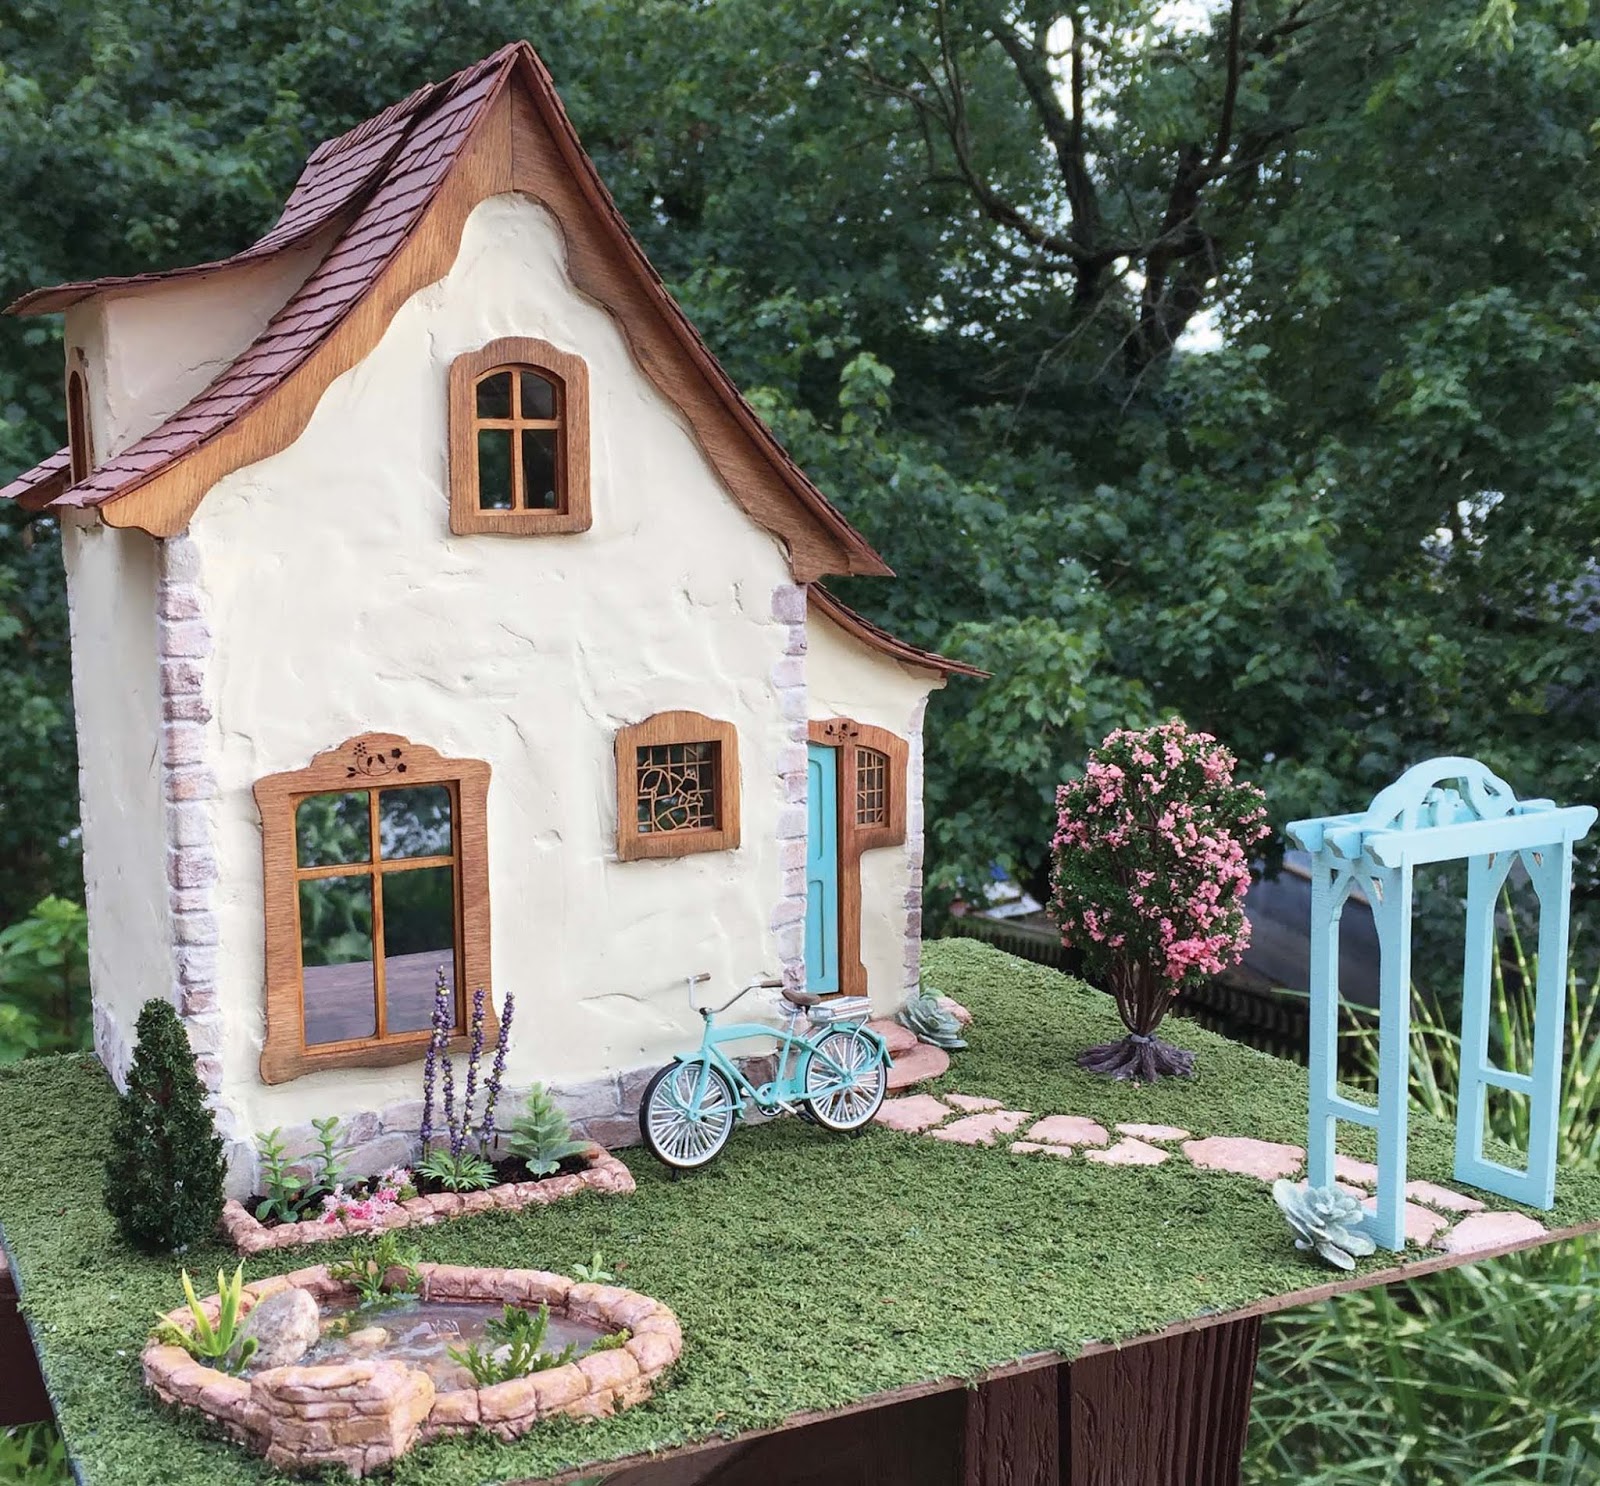
In my previous post
I showed you how to sculpt with Paperclay and paint once dry. I used the same paint for the stone wall around this pond as I did the garden beds.
When I sculpted this pond, I did it in two layers using wood glue in-between. I adhered it to the board with the same glue. This is super important because Paperclay shrinks while drying!


Paint the base of your pond in the color of your choice. I went with a dark brown swirled over my dark blue/green base. Be sure to add this color to the waterfall area as well. Constant water flow would make it grimy. Let the paint dry. Unfortunately my base started to crack along with the Aqua Magic as it cured so always test your products first! I just reapplied in all the cracks to try and save it. No detailed instructions came with the product so I may have applied it too thick.


Gather some greens and rocks for your pond interior. I had a few cracks in my pond wall and filled them with some of the greens using Tacky Glue.
Glue all your components in to your liking. Use tweezers for this! Let the glue dry.

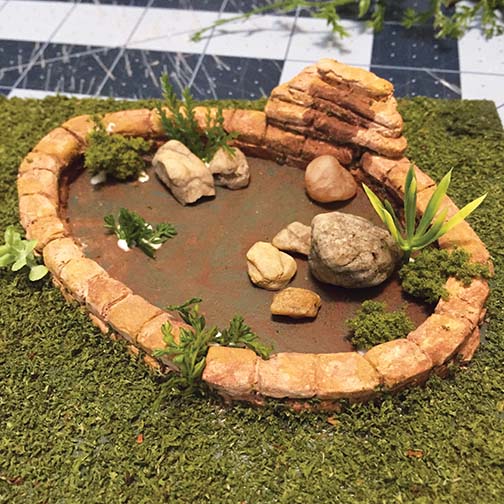
I didn’t want to sculpt 1:12 scale fish so I opted to paint them. I used a bright orange and a dark terra-cotta paint. Instead of my brush I used a toothpick and scooped up a blob, put it down and pulled away with the toothpick to make the tail. Practice what method works for you before painting in the pond.


I also dotted a little white for the fishes head using a toothpick.
I made a few darker fish as well. You can blend the two colors together and add some shadowing on your fish if you like, but at this small scale I didn’t feel it was needed.
Now let everything dry. I jumped the gun, so my Tacky Glue bled in the ‘water’ treatment I used. I had to add more greens to cover it just in case. So please let everything dry for less fixes.
I had Aqua Magic on hand and used it for my ‘water’. But there are lots of options for this effect. You can use a Resin mix (but it does tend to bubble so you may need to lift and drop your pond on a hard surface to get the stubborn bubbles out). Walmart has an affordable acrylic water kit. Other diorama specialists offer kits and products that will work. Research on Google. There are a lot of great video tutorials out there!
I poured in the product and let it set for a few hours then made some textures with a toothpick in the waterfall area, added more product and did it again after a few hours. Pour a little over your waterfall area too.

I let it dry overnight and, in that same area I had textured, I was able to pull some clumps up with a toothpick and place them in the water fall area.

Then I poured a little more product over them and let it flow into the pond. Then, after a few hours, I textured it a little.
Another option for the waterfall area is to use a glue/bonding agent that is clear with a jelly-like texture. There are a few out there but I have forgotten what they are called. I got one from the hardware store years ago. If you are familiar please write in and I can share in our next issue.

If you plan on adding lily pads, do this after your last pond application sets for a few hours. Place with tweezers and tap in. Don’t forget to add a frog in there somewhere! Visit my Instagram @auraleakrieger.
You can purchase your own cottage kit at www.
redcottageminiatures.com.


Has hecho un buen trabajo con el agua y los peces quedan muy bien.
ReplyDeletePrecioso estanque! y una gran idea la de pintar los peces,parecen muy reales!
ReplyDeleteBesos.
I think that this pond looks DEEP and the fish look HAPPY! I Love your technique for making them and your tips on how to paint the bottom of the pond. Even before you added the water, the rocks and greenery growing in it looked Great, the ripples on the surface with the waterfall and the fish, are the cherries on top!
ReplyDelete