Labels

Thursday, June 21, 2018

Miniature antique book tutorial


A friend asked if I would show her how to make a book so I thought I would post for my other mini friends as well. Here we go!

This is a long process to create a little book, but I came up with it because I wanted to see the page texture when the book was closed. With antique books sometimes there are also little chunks of pages set out from each other. This technique really accentuates that. You could also skip the page method all-together and just use a block of wood. It depends on the effect you want. 

Print out the covers with spines on card stock.
If I’m making ‘old books’ I use cream paper because I feel it makes the colors look richer and I have a lot of this paper on hand. Let the ink dry for 15 minutes. 

Then spray with a fixative, wait two minutes and spray again. Let that dry for 10 minutes or more. 


Get a medium-size, flat, soft paint brush and brush on satin gloss. This needs to be done quickly and evenly, because you don’t want to pull up your ink. Brush down, brush up, and go back down to be sure there are no thick lines of varnish. 
Clean your brush. Once the varnish is dry, brush on varnish smoothly again. Let dry. 


I use old issues of EveryDay Food magazines because they are small, similar to the old TV guides (do they still print those?). Ideally you need a magazine with a perfect binding as shown in photo. 

Rip off the cover and the back from the spine. You won’t be using the original spine so if that comes off too, no worries. 

Determine the thickness of the book you would like to make. Hold the magazine in both hands and rip down the spine to get the pages off for that thickness. I have made quite a few books so my magazine is very short. But you can see the spine and the thickness. 

with cover still on
 cover, back and spine pulled off

Next, put your magazine on the edge of the table and put some sort of weight on it, but keep the loose page edge free and clear from the weight. 


Paint Mod Podge on the long edge. You don’t want it too thick so put it on two times in thin coats being sure to push hard enough to keep the texture of the pages showing. Let it dry and do this once more in a thin coat. Let dry.

Cut out your book covers and use pencil or marker to color the edges. I also color the back inside around the edges just in case a piece shows. 


Line your book up on your ruler so it is square and bend on the spine line. 


Then press your partially folded cover against the magazine and fold over. 


Mark a line just inside your cover at each end of the magazine. 


For this next step your blade needs to be very sharp. Either give it a good workout on your sharpening stone or put in a new blade. I have had this one blade for months using my stone! We are such throw-away society, every little thing we can do to conserve helps. Plus, the sharpening stone makes a great weight.

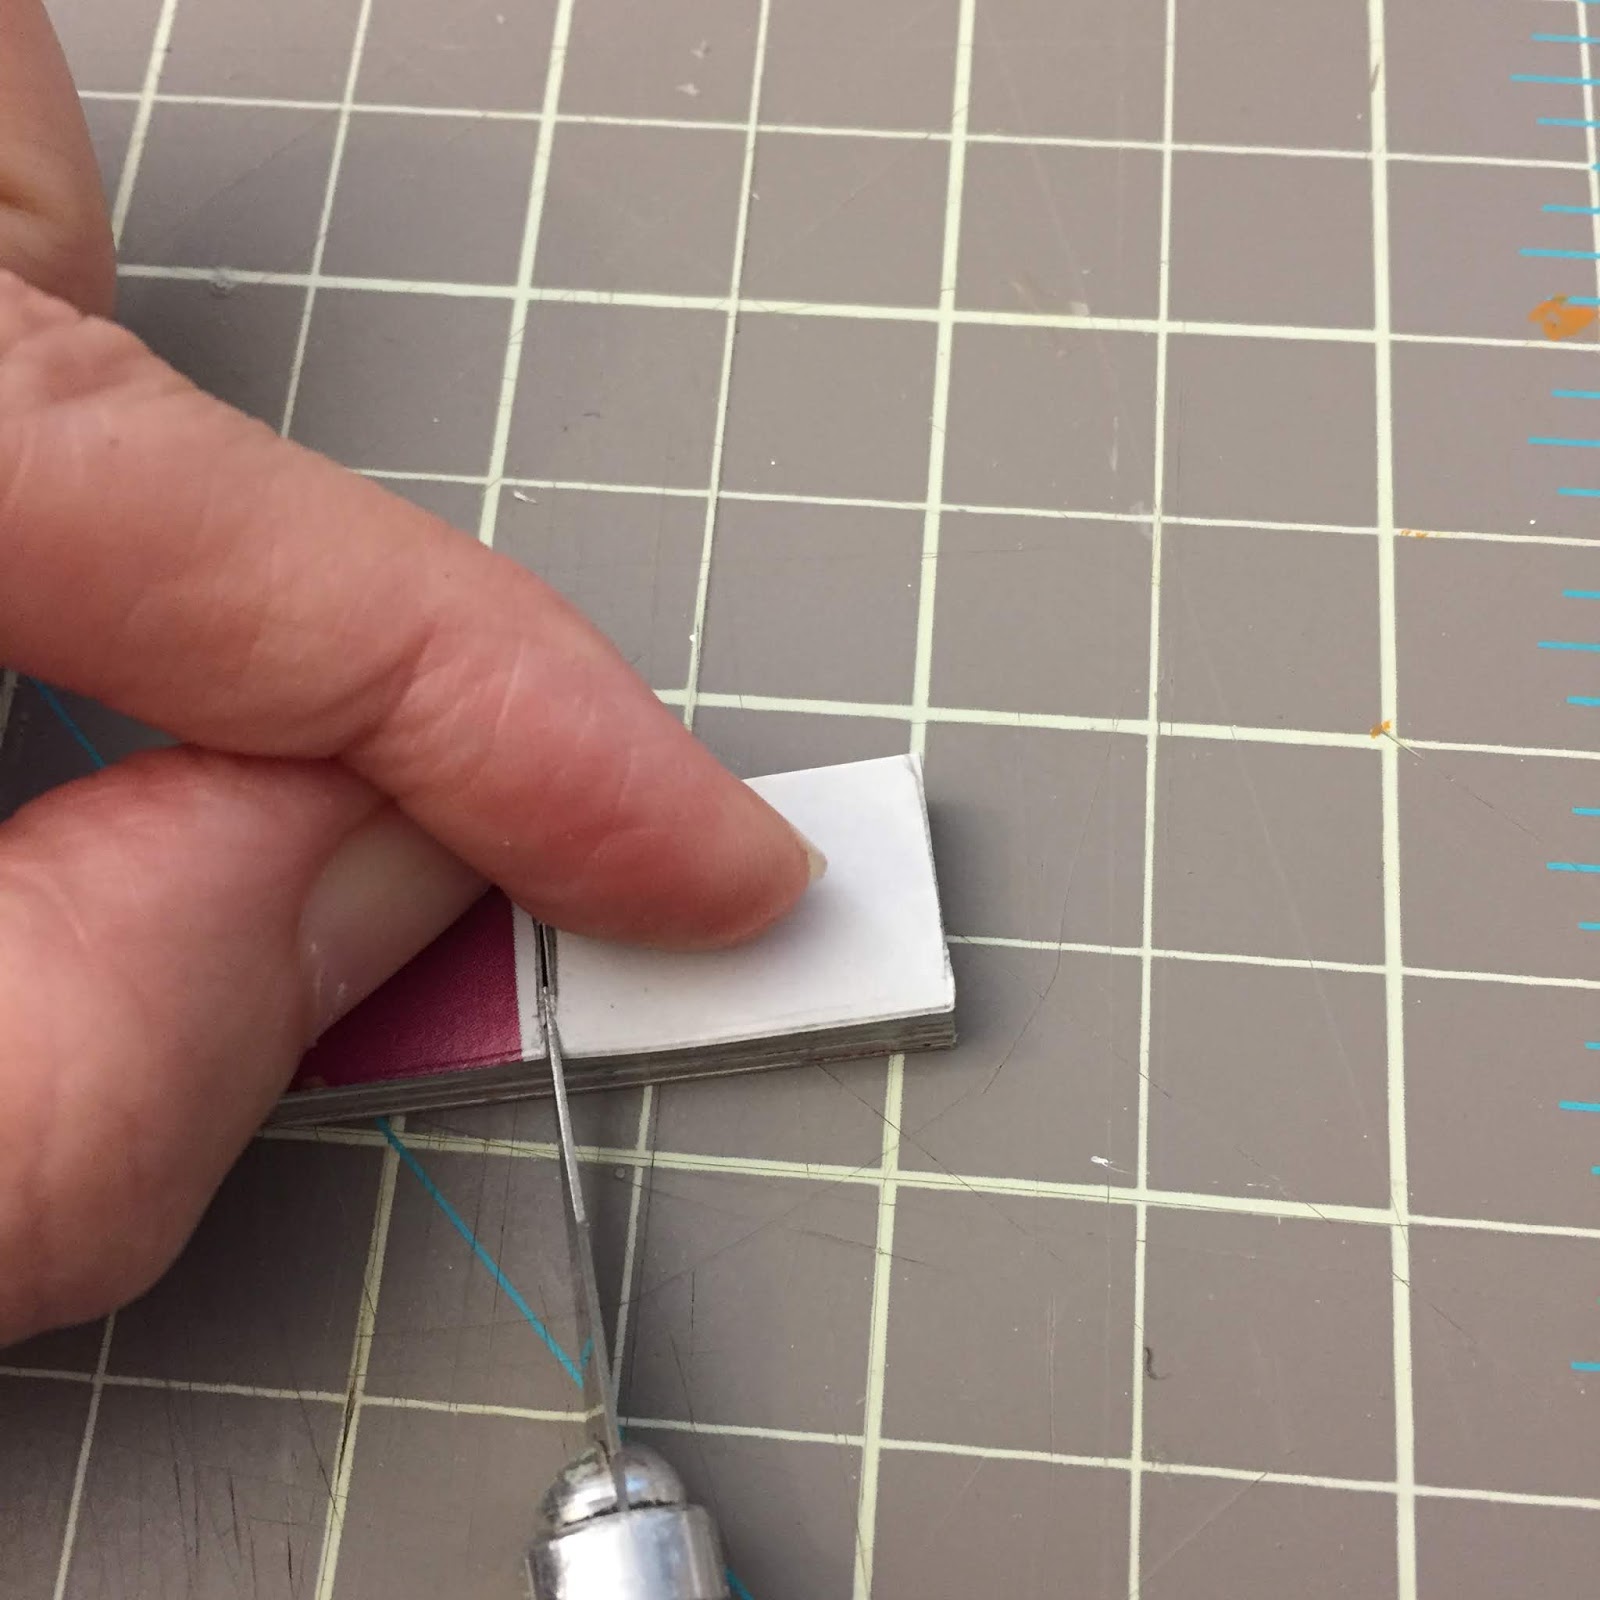
Line a metal ruler (with a cork back) up and keep cutting until you have cut through. Keep your blade as straight up and down as possible. 


Put your cover on the new piece you cut and draw a line for the height. Make it just inside the book cover so it will look real. 


I will cut the side that is not glued together towards me and not cut the Mod Podge side with my knife. Then I turn it around and start cutting through the Mod Podge part. It helps keep the cut cleaner without squishing it and cutting crooked. 
If you’re not comfortable doing that just cut straight through towards yourself with the Mod Podge facing spine away from you. This is why I make a few books at a time because some will be keepers and some will be a little rough and look better on a bookshelf. 


Depending on your Mod Podge covering it might come apart, just Tacky Glue it back together by coating glue on the actual page. Press together and wipe away any excess glue. Press until dry. Don't be disappointed if this happens! This is one of the things that will make your book look more authentic. Old books can have jacked up spines. That is what gives them character. If you want this effect cut a piece away and glue together.


I line up my books on the edge of my table and put a weight on them and paint the edges with bright white paint (It helps cover the dark edges quicker than two coats of cream) then Mod Podge and then cream colored paint. If you want your edges to be gold then you can paint them gold or use a gold gel pen. Try not to let your paint clump up on the back and front as you paint the edges. You can lightly sand them later but it’s better to take care of it while painting. I added the scrap piece to keep my weight flat.


Once the edges are dry you can paint the top and bottom. It’s a long process but worth it if you want a little book that will look nice in close up photos. 

Clean your hands! Keep a damp wash cloth handy. A clean work station will always result in a cleaner finished piece!

Test fit your books into their covers to see which fits the nicest. Coat the front, back, and spine of the book with Tacky Glue and smooth over with your finger to the edges. Use your middle finger so you can use your pointer finger to press together. Place inside your cover and press until dry. I used my froggy weight! Yup, that’s how I roll…me and stone froggy makin’ minis.


For a finishing touch I like to use a course paint brush and rub on some dark yellow and brown pastel chalk. Blow off the extra and rub over the book edges with your finger.


So now you have some cool antique style little books! have some fun finding cool covers. Next time you are at an antique/junk shop snap a few cover photos of an old book opened flat with your phone. And maybe buy a little something for your project in return for a great cover shot.


Sunday, May 27, 2018

Gottschalk dollhouse floor resortation


Previous post


The old floor was destroyed from ripping up the carpet so I had to make my own based on small samples that were mildly visible. 
Here is a photo of the damaged floor and the new floor I created.


I drew it and built it in Adobe Indesign then brought it into Photoshop and put a noise filter on it and then kept doing color tests and printing tests. (Above isn't the true color of the original floor.) I had to keep holding a sample next to the real floor to get the color exact.
Then I printed on regular paper, sprayed three coats of fixative, painted 2 coats of satin varnish, and Installed with a spray fixative. I’m a lot happier than I thought I would be with it.  


Above: When I first got the house.

Before wallpaper and floor


After


The wallpaper is so much fun! I love turquoise and red together.


Next up is the foyer.

Sunday, May 20, 2018

Vintage Gottschalk Dollhouse update

Previous post
http://naturessoulminiatures.blogspot.com/2018/05/vintage-dollhouse.html


I made some progress on restoring my 1920-30s Gottschalk. The left is how I received it.

After sealing what I discovered was lead paint with shellac I gave it a wash of new paint to freshen it ups a bit. Then I distressed the paint and rubbed on some brown pastel here and there so it didn't look too new.
I also had to repair the roof framing on the top left. The entire frame was unattached from the house!
I did a lot of research online to try and guess what the colors it may have originally been. I have not seen his house as of yet so my guess is it is pretty rare. I added the window framing and found some vintage flowers that were used back then to fill the holes in the "planter boxes".


I mixed my own acrylic paint and added a wash over the more damaged areas of the roof and then sprayed it with polyurethane clear satin. The age still shows through.

I wanted to lighten up the doors so I painted them and trimmed them out with white. After sanding the doors a bit I could see where the original white framing was.

I took the curtains out because they were disintegrating and not salvageable. They were glued onto the white panes with so much glue I had to take out the panes as well to scrape them off using my knife. Come to find out the panes are made from cardboard not plastic as I had thought. I gave them a wash of white paint and will reinstall after I resolve the wallpaper inside.


I couldn't help myself and started ripping up the disgusting blue carpet inside. I was very excited to see the original floor was there but sad that they were not salvageable.
The good new is I can now replicate it on my computer and print out a new floor.


Then I went upstairs to see what was under the carpet. Thankfully whoever installed it left the paper backing on the carpet when installing it so I was able to use warm water with palmolive and scrap it up. I had to use my fingernail under the rubber glove anything else took the floor print up.


So HAPPY about this! I will be able to have the original floor here. Only a few nicks.

The wallpaper will be next. I have already seen clues to what the original was.
Tiny piece of red paper under there!

This process has been very rewarding and I look forward to bringing this beauty closer to what a true Gottschalk would have been. There may be a few things I will alter to make this my own, but I still want to respect the time period. I do hope one day I will find another like this model out there.
Until next time, thanks for stopping by. :)

Next post
http://naturessoulminiatures.blogspot.com/2018/05/gottschalk-dollhouse-floor-resortation.html

Wednesday, May 2, 2018

Vintage Gottschalk Dollhouse

Hello all! I have purchased my first vintage house. It was made in the 1930s. 1:12 scale. It will take time to restore but I am excited to get started. As you may know from earlier posts I made a replica of a vintage house but this one is the real deal.
I will be repairing/renovating it but also respecting its vintage beauty.


I think it may have been based on this smaller scale German house from 1930 but made in 1:12.
This house is very small, but the similarities are amazing. UPDATE May 5 - I have discovered my dollhouse is a Gottschalk but have not found a replica just yet.


There is something magical about adding a worn beauty to your collection and nurturing it. Each crack, water stain, and loose nail tells a story. If you take the time to listen the little house will tell you what it needs. :)

Saturday, March 24, 2018

Easter Bunny sighting


Little Elizabeth thought the Easter Bunny would be a bit chilly while delivering his eggs in the early morning.
So she left him some warm tea and sweet treats. Secretly hoping to see him for herself, she took her time making sure the display of cookies was perfect. When she heard a rustling in the garden she quickly hid behind the post to have a peek.
He was much taller than she had imagined but his white coat just as fluffy.


His nose twitched and ears turned as he hopped onto the porch to enjoy his warm tea and a delicious cookie.
She could barely breathe as she stayed hidden behind him in the corner of the porch. With a twinkle in his eye and a few hops he was once again in the garden and on his way.


She watched as he left and gathered the sky blue egg that he tucked away in the flower bed.
Elizabeth thought the Easter Bunny was not aware of her spying eye. But you can be sure he is only seen when he wishes to be seen. Perhaps this magical sighting was a little present for her thoughtfulness and generosity.


Beautiful doll made by Iris Bodenbender. Easter bunny made by me! (Bunny has bendable arms, legs torso, and ears. Head turns. Sculpted, furred and dressed))

Tuesday, February 20, 2018

I'm on Instagram!

Follow me on Instagram!


https://www.instagram.com/auraleakrieger/

Monday, February 19, 2018

Miniature elf doors for dollhouse

I finished all the doors in the fantasy build! The main entry door is so fun! All of the doors were extremely meticulous and made from scratch. Wood, paper and wire. A necklace charm is on the door window.

Here is a link to my other blog to show how I did the hinge. For these wood doors I also carved away a notch for the hinge to sit in.


Miniature animals

I occasionally list my creation or other minis for sale on my eBay store


Cover of American Miniaturist


Very flattered that the publisher ask that the foyer from my Ophelia dollhouse be on the cover of the March issue of America Miniaturist!

Sometimes it is tricky for me to separate myself as editor and also as a miniature artist. My number one goal is to support other artists through this publication, so sharing my own work as a feature can feel a bit awkward. But because March is my birthday month this is a wonderful present.

I have chosen American Miniaturist as a platform to feature my Ophelia dollhouse tour over the next few months.
The first time I was ever featured many, many years ago, before being editor, was in AM as a contributor. So this publication has remained close to my heart.