Back in December 2018 I was trying to come up with a fun Valentine tutorial for American Miniaturist and a teddy bear came to mind. Since then, I have seen my bear a lot on Etsy so it looks like the tutorial helped many. But the best is seeing the individual spin the makers put on my tutorial.

First, roll out two balls of brown clay. One for the head and one for the nose.

Cut the smaller one in half and score the inside with a needle tool.
Score a place on the lower center of the head and press on the nose. Use a sculpting brush to gently blend the two together.

Roll out a tube of clay and cut the ends off evenly for the ears. Use your best judgment for size.

Press them down to make an ear shape and make an indentation with your sculpting brush.

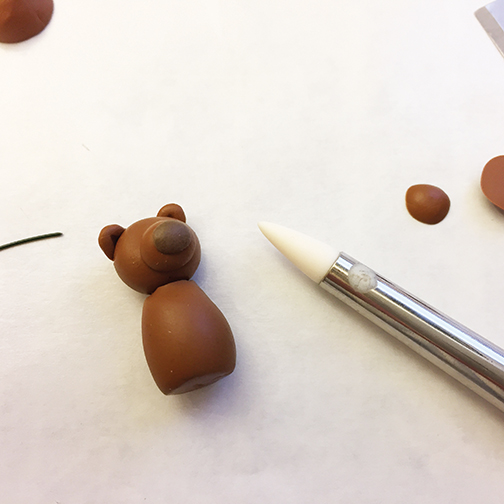
Score the spots where the ears will go on the head. Press them on and blend the backs and sides to the head.
Shape the head a little so you have a place for the eyes. Sort of press and pull until you like the shape.

Press the nose against the table to get a mild, flat indentation.
Use a darker brown clay and make an oval ball and press for the nose.
Score the nose spot on the head, lift the dark brown nose off the wax paper with your knife and press it on.

Roll out a tear drop shape for the body and cut the top and the base off.

Score the neck and push a wire in and take it out. Score the bottom of the head. Push the wire in at an angle so his head is tilted. Then push both into the neck. Blend together a little to be sure they stick and are touching.

Roll out the legs and feet. Score and place them together.

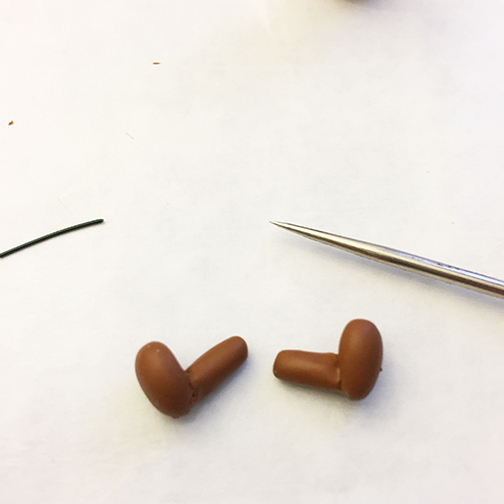
Score and insert/remove a wire in the leg areas on the body. Press the wire in the legs and attach them to the body.
I baked him so I could really press his arms on without ruining his shape. Baking now is up to you. If you want his toes to be the same clay as his nose do those before you bake so they will stick. I painted his toes and nose a dark brown.
Roll out his arms as shown. Once you break them apart, flatten the ends so they are thin and will wrap around the back nicely. You may have to ‘dry fit’ a few times to get the right length and shape. Blend with the sculpting brush.


The heart
I was in my zone and forgot to take photos here. Press a small ball on your tile. Use the blade on both sides to make a base point. Use the needle to stipple out the top indent and push away the excess clay. Use a sculpting brush to smooth it out. Bake and let cool. I added red paint to it with a toothpick.


Painting
Paint the nose and toes. I used a toothpick to do this. Let dry.
Flocking
Super easy! Use a small brush and apply Tacky Glue to the areas you want flocked. Start with the head. Use tweezers to apply the flocking (which you should have put in a small bowl) and tap the bear on the bowl while holding with another set of tweezers to get excess off. Let dry and then work your way down. Keep applying the flocking until he looks furry.
Then glue the heart on his belly! Next, make your teddy any color you wish! You could even snip yarn and make him even more fluffy!
Have fun making your own mini teddy bears! See more of my work on Instagram @auraleakrieger


Precioso trabajo.
ReplyDeleteSweet little bear!
ReplyDeleteUn precioso oso amoroso!!! Gracias por el tutorial.
ReplyDeleteBesos.