
I made this tutorial last year. I am finally catching up in posting all my 2019 tutorials!
If you have a dollhouse garden or even a little sun porch, why not add a gnome? But be forewarned, he will only treat you and your garden as well as you treat him.
This is a very simple design so even if you have never worked with polymer before this is fun project to try. If you have worked with polymer clay before then why not take a break from more intense projects and have some imaginative freedom.
Polymer clay: Flesh tone, white, blue, red, brown
Stylus tool
Needle tool or toothpick
Bake and Bond
Pink artist pastel
Small paint brush
Shaping tool
Toothpick
Roll a half-inch ball with the flesh tone clay for the head and a smaller ball for the nose.

Tape down a piece or wax paper for a clean work surface.
Shape a red piece of clay for the hat. Use a stylus tool to push an indent for the head into the hat. You may have to reshape to keep the hat small after this. Cut away clay from the top and roll to get a point back again.

Roll a tube for the body using blue clay. Indent the top for the head to sit in.


Clean your hands before you touch the head again.
Cut a small section away from the back top of the head.

Place the head and the hat on the body.

Brush on some pick checks.

Cut away a small piece from the nose.


Give the nose a brush of pink pastel.

Roll on oval ball of brown clay. Press flat with finger and cut in half.

Put side by side and flatten the back of the feet.
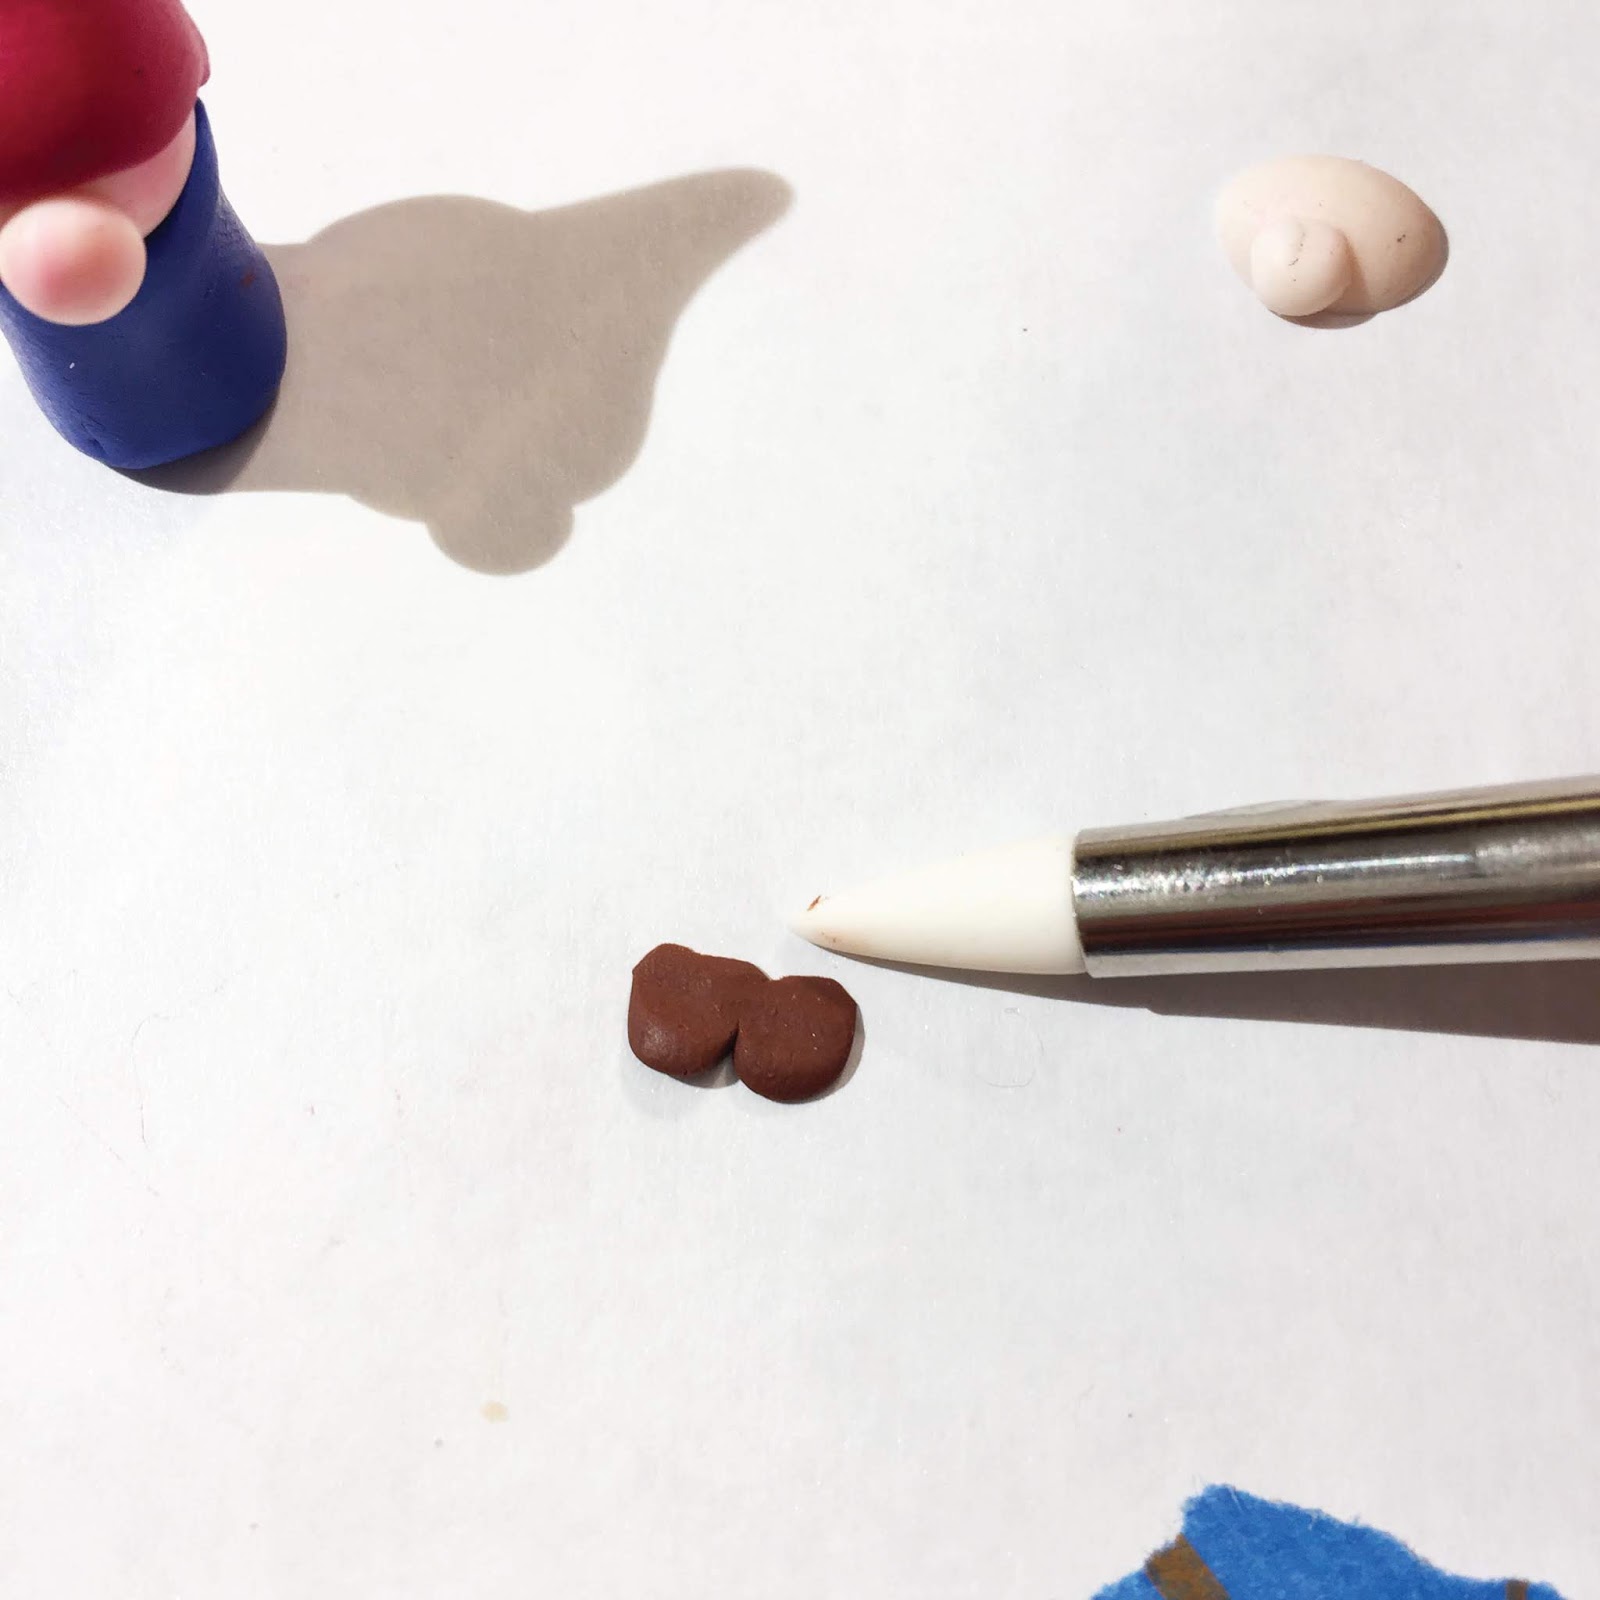
Press body on top of feet so the tips peek out. You could also separate the feet more than I did too.
Bake your Gnome according to the manufacturers instructions. Let cool.
Shape a white beard to go under his mouth and up to his hat. Test fit and latte under his nose a little using a shaping tool.


Use a needle tool to make texture on the beard. (My knife was only there to secure the Gnome from rolling over for the photos.)
Brush away excess clay.
Trim the beard at the hat edge.
Bake your Gnome according to the manufacturers instructions.

Place him in your miniature garden so he can keep things tidy while you aren’t looking.


Your little garden gnome is Adorable Auralea, and has found an ideal home amongst the garden flowers
ReplyDeleteGracias por mostrarnos el tutorial.
ReplyDeleteParabéns, amei o tutorial. Obrigada
ReplyDeleteHello! I'm new to clay and I'm just wondering why the beard was attached after the first baking? Could it not have gone on with the others, for the first baking? Thanks in advance!
ReplyDeleteYou can bake it in any order you want. :)
Delete